Please use the left navigation bar to browse through this support. Let s go !
Installation
Before install, please make sure you have the components bellow enable on your server
			PHP 5.2 or greater
               MySQL (4.1+) MySQL (4.1+), MySQLi,
Installation Ticket System for WooCommerce
Installation
- 1. Download Ticket System for WooCommerce plugin from our websites .
- 2. If downloaded as a zip archive, Than keep zip file to your desktop.
- 3. Go to Plugins screen in site admin panel and select Add New.
- 4. Click on upload plugin and Browse plugin zip File from desktop.
- 5. Install the plugin
- 6. Click Activate Plugin to activate it.
- 7. after activate plugin go to Ticket System setting tab and fill requirement according to instruction below.
The Ticket System For WooCommerce Introductions
Ticket System Pro allows you to provide a complete customer care service and excellent support attendance. It allows every customer to submit support requests in the most suitable manner. This Extension enables customer support to receive, process, and respond to service requests without any hassle and it tracks pre and post-sale support inquiries. So here you can create multiple departments to effectively manage inquiries. Its Email Management System Make this Module More Effective. It is connected with Notification Emails that updates both Customer and Admin. Also, Admin can Design Email Template from Admin setting This module is important for all E-Commerce store Owners and admin, with the help of this extension, customers can generate tickets for the store and the store owner can easily manage those tickets. This ticket system pro module has all the capabilities that a professional ticket system needs to have.
Structure of work
To create ticket Login as a customer Here
https://wptheme.co.in/wp-ticketsystem/my-account/
Customer Login -> [email protected]
Password-> 123456
After login click on support center menu(in navigation Bar)
visit support center page and click link to create ticket
See print screen: https://prnt.sc/G7ZMdVePJvgv
after submition form ticket created
See print screen https://prnt.sc/fL4E5gL2_QLN
https://wptheme.co.in/wp-ticketsystem/wp-admin/admin.php?page=ticket
AdminAdmin can access ticket and assign to agent for solve ticket.
login admin
user-> admin
psw -> admin123
After login visit on ticket list page
seet print screen :
https://prnt.sc/2EVfVuTYF_FT
1. select ticket
2. assign ticket to agent
3. agent get notification by email
To solve the ticket, Agent Access Ticket after login here
Login as a Agent
https://wptheme.co.in/wp-ticketsystem/my-account/
agent login-> [email protected]
password-> 123456
See print screen: https://prnt.sc/sdxEy-uNtG0P
agent view ticket and read ticket requirement or communicate to client with chat system
update the ticket status and solve client requirement. customer and admin get email notification on every status.
See print screen: https://prnt.sc/WIrSosZ9Eprq
Why use our Ticket System
Improve customer relations and Build customer loyalty Creates an advance customer support management system create multiple departments to manage tickets View & reply customer tickets from Admin panel Send & receive email notifications.
The Featured List :
- Clean and responsive Design work on PC/Tablet
- Rich of Feature Present in this Module
- Dashboard to Manage Ticket
- Fast search and ajax loading
- Fully Customize Module
- Custom Layouts
- Fully Customize Module
- Email notifications when a ticket is updated
- Separate assignment: each ticket can be assigned to Different purpose to avoid confusion
- Search Bar to Search for Tickets if one has many
- File attachments
- customer and admin can send and receive images along with tickets
- Filter Options are Available With this you can find Ticket Easily.
- Eassy to Understand
- Create support departments and assign admin users to them
- Responsive Chat System
- No Core file overwrite
- Easy to install & Manage
- Advance Setting
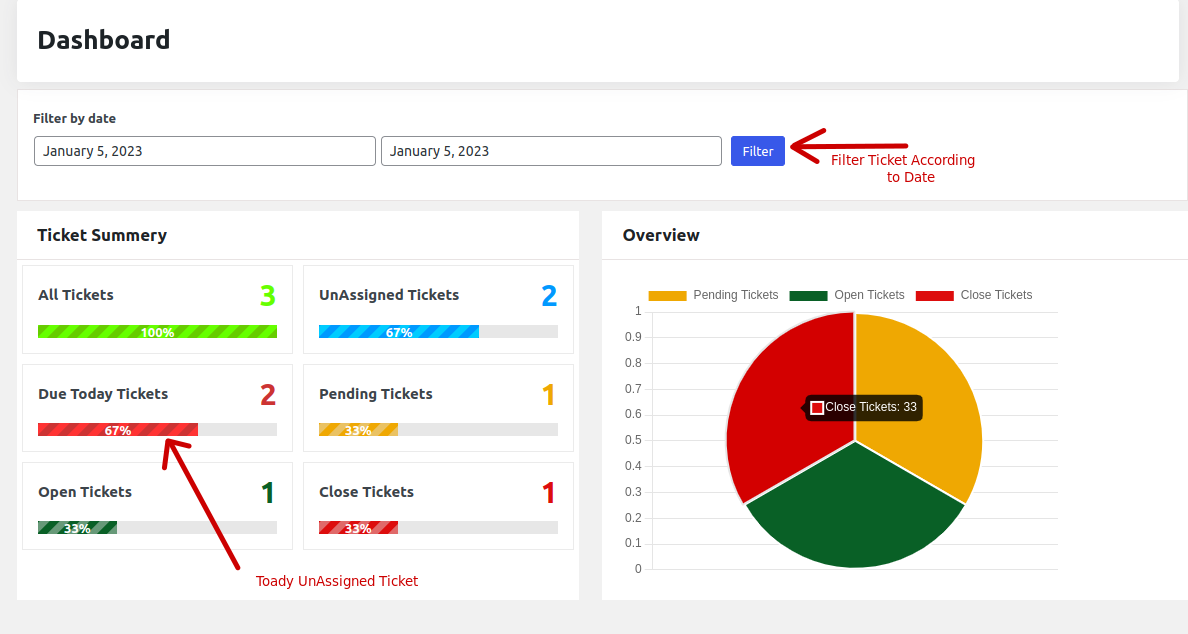
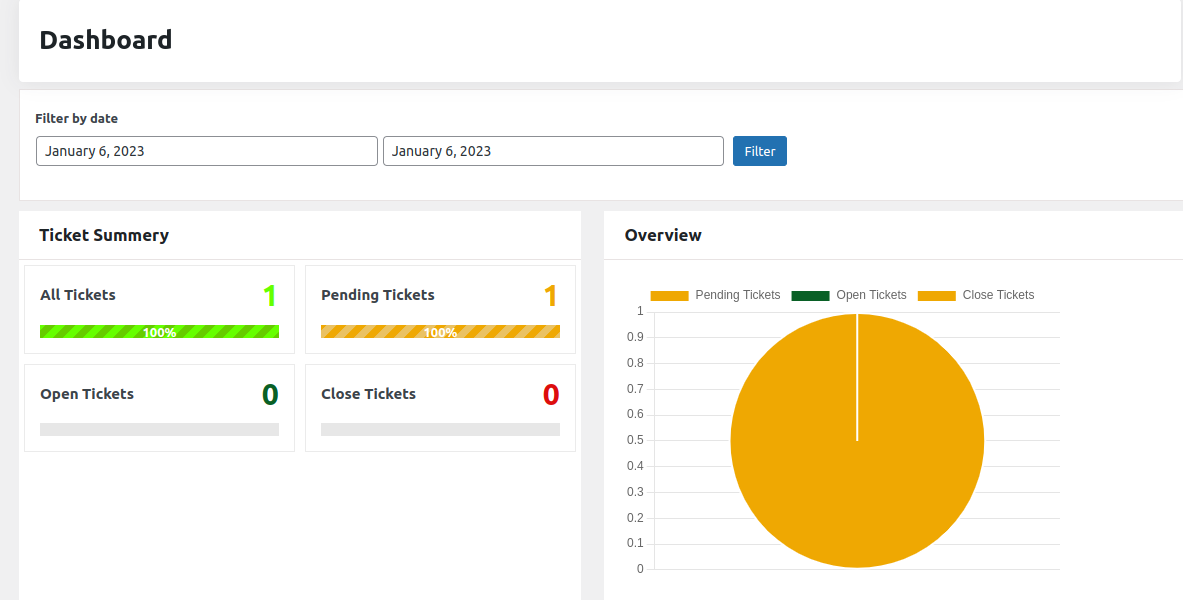
Admin Dashboard :
Admin can easily manage ticket from the dashboard. Ticket can also filtered according to the date.
Admin can see the Summary of the all tickets and the overview of all tickets status. It makes eassy to manage work.
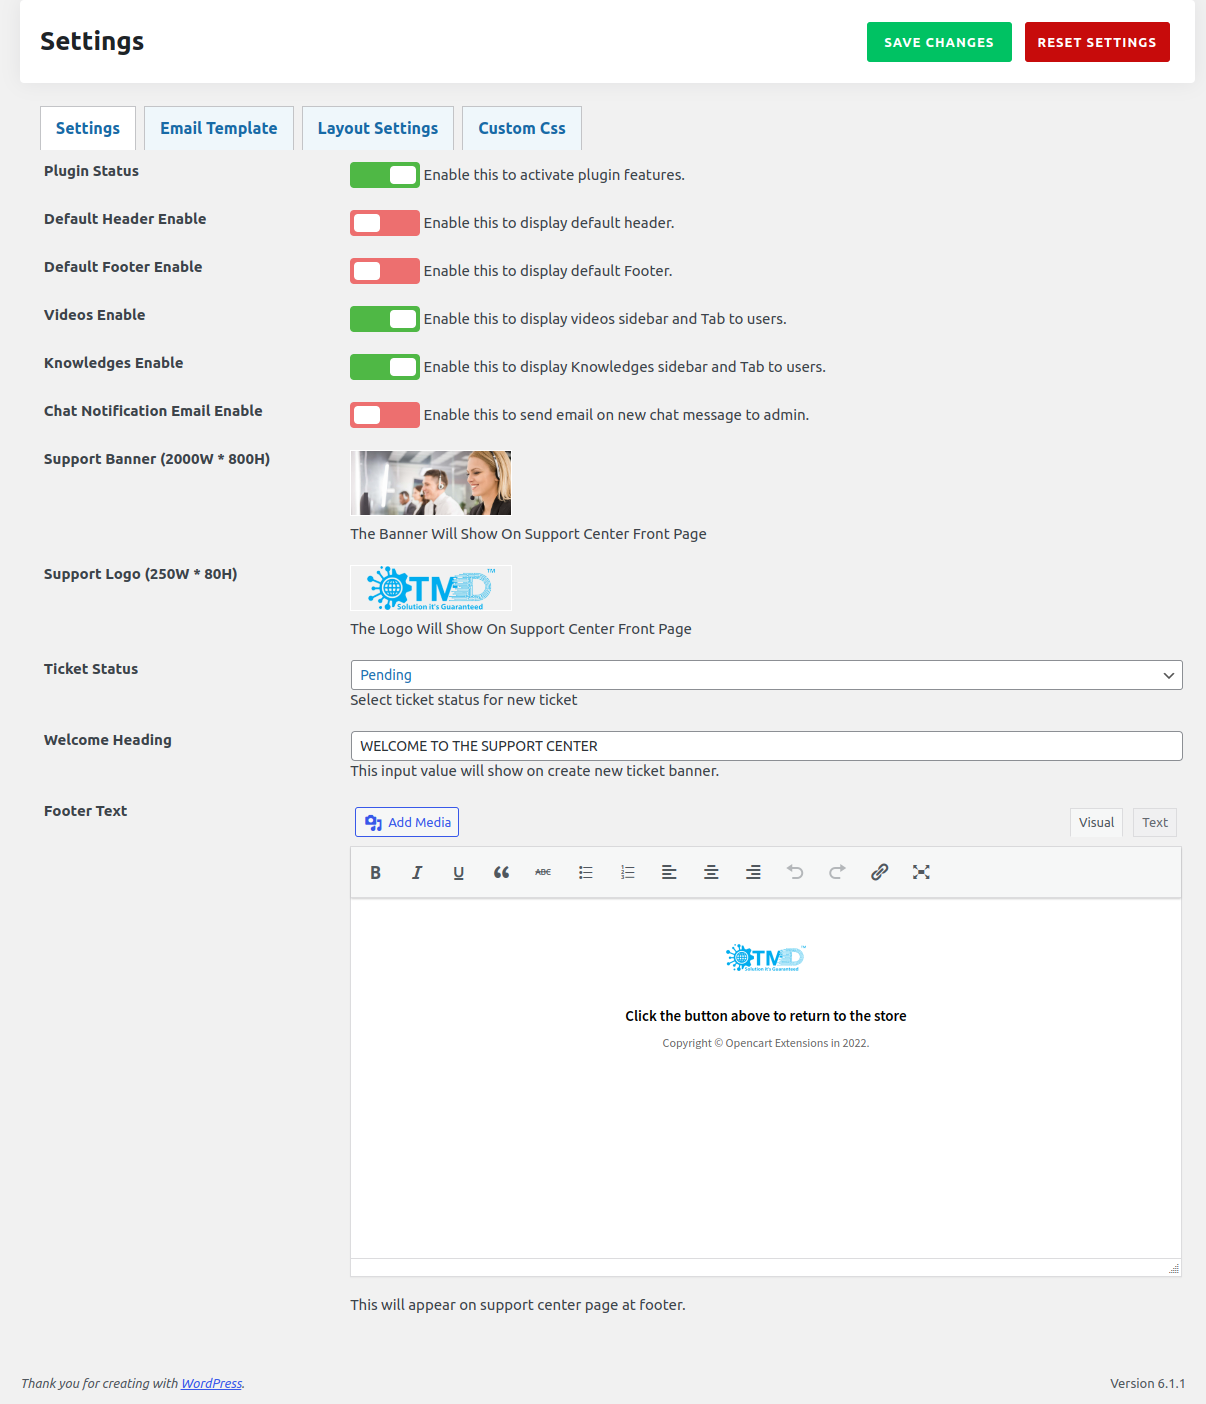
Settings :
Settings is a important part of the ticket system. Admin can manage settings according to there need.
- Enable plugin status to use the features of this plugin
- Enable Default Header shows the default Header of the WordPress
- Enable Default Header shows the default Footer of the WordPress
- Enable Videos to shows the videos on the user Support dashboard pannel
- Enable Knowledge to shows the Knowledge on the user Support dashboard pannel
- Enable Chat Notificaton Email to send notification to admin on new message from user
- Click on Image to change banner Or logo
- Select Ticket Status of new created Ticket
- Reset Setting Change all the settings to the default settings
Email Template :
Email Template is used to send notification to the admin, user and agent to send notification. admin can modify this template according to there needs.
Use Shortcodes to modify this template.
Click on shortcode button to see all shortcodes.

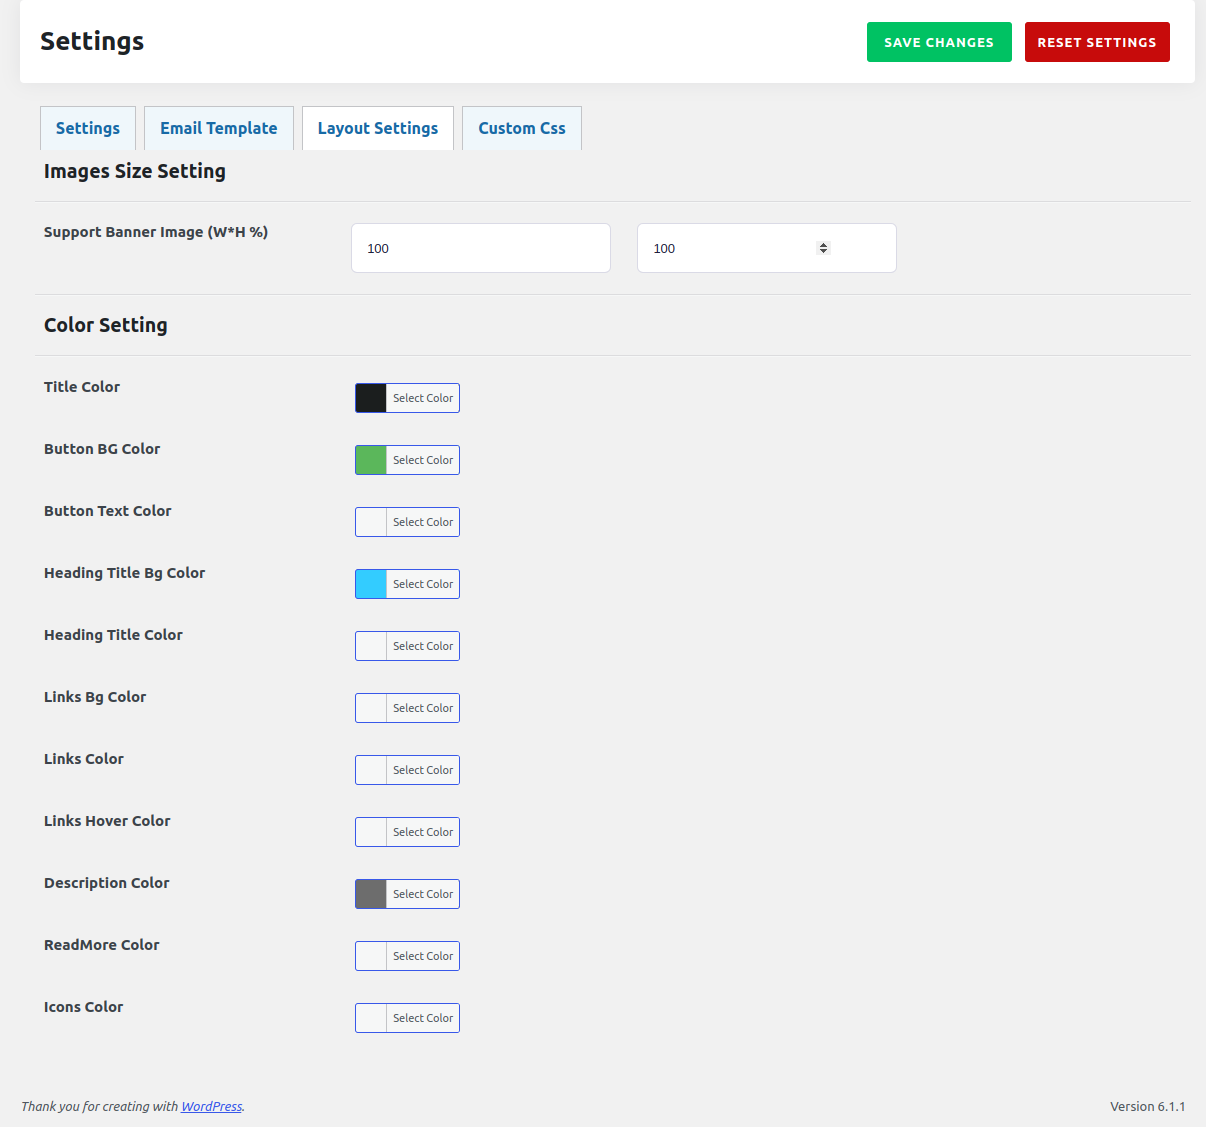
Layout Settings :
Layout Settinng can change the lauout of the user side. admin can set height weidth of the support Banner image. Color Settings is used to change the layout of the user side hedding color, text color, button color, background color accoding to there needs.
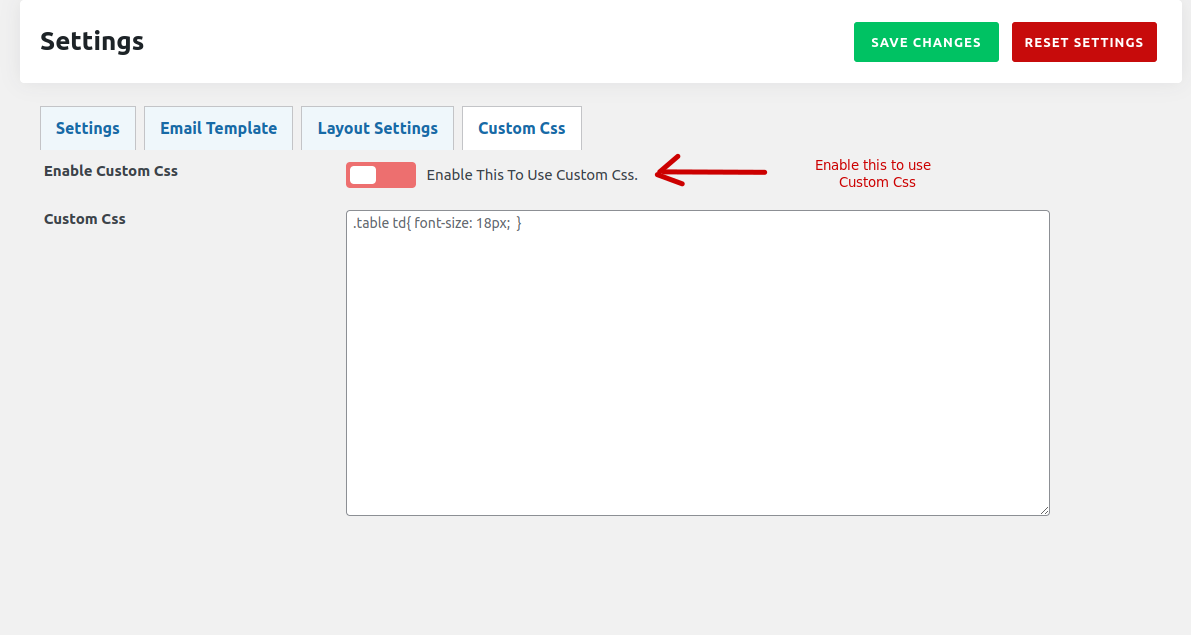
Custom Css :
Enable the Custom Css to Change the layout according to the need. You Can write you custom css in custom css box. And you can see the change on the user Side.
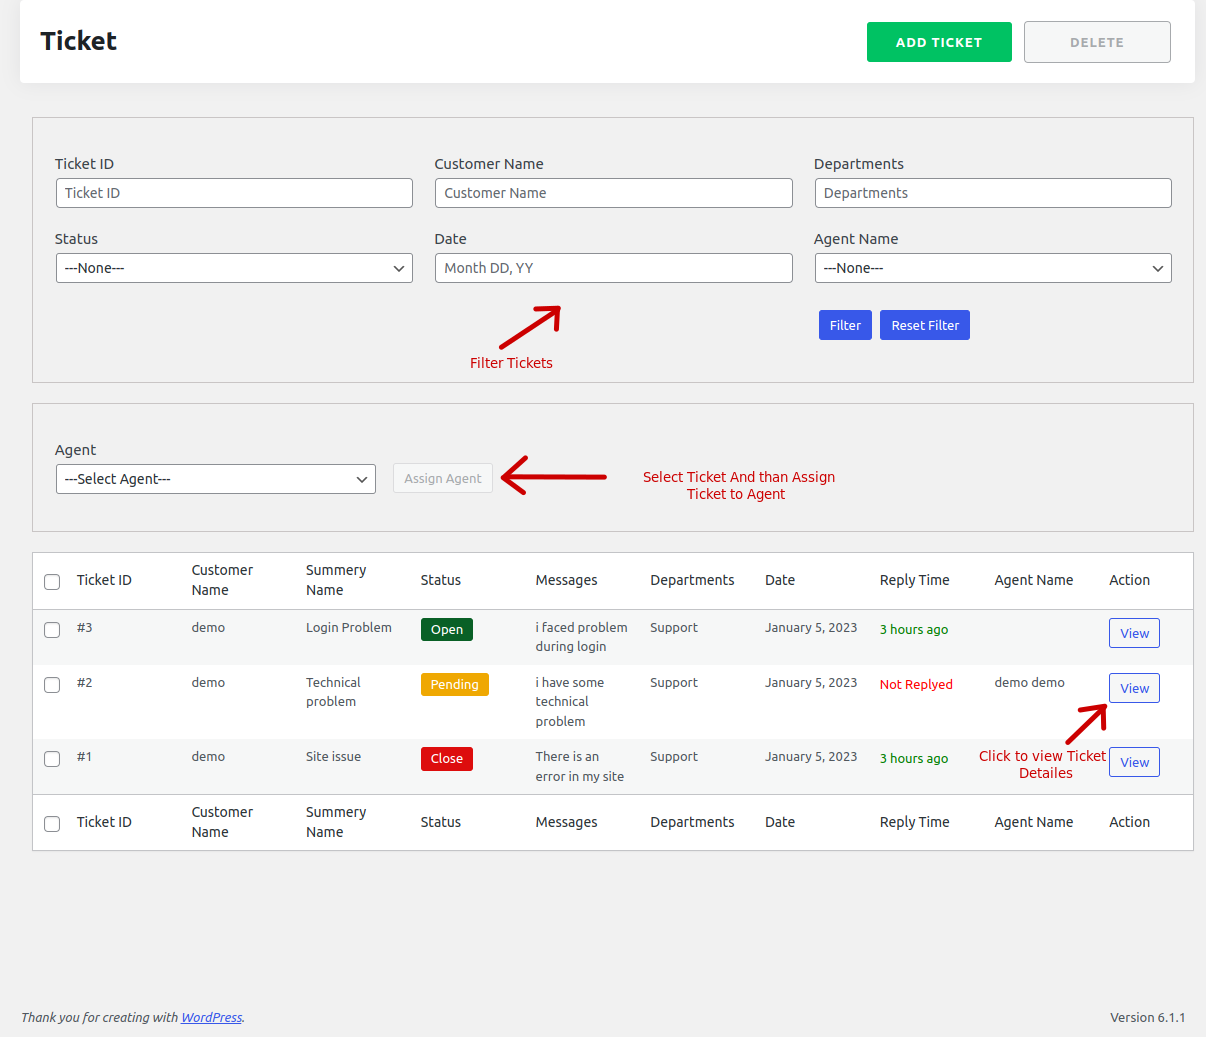
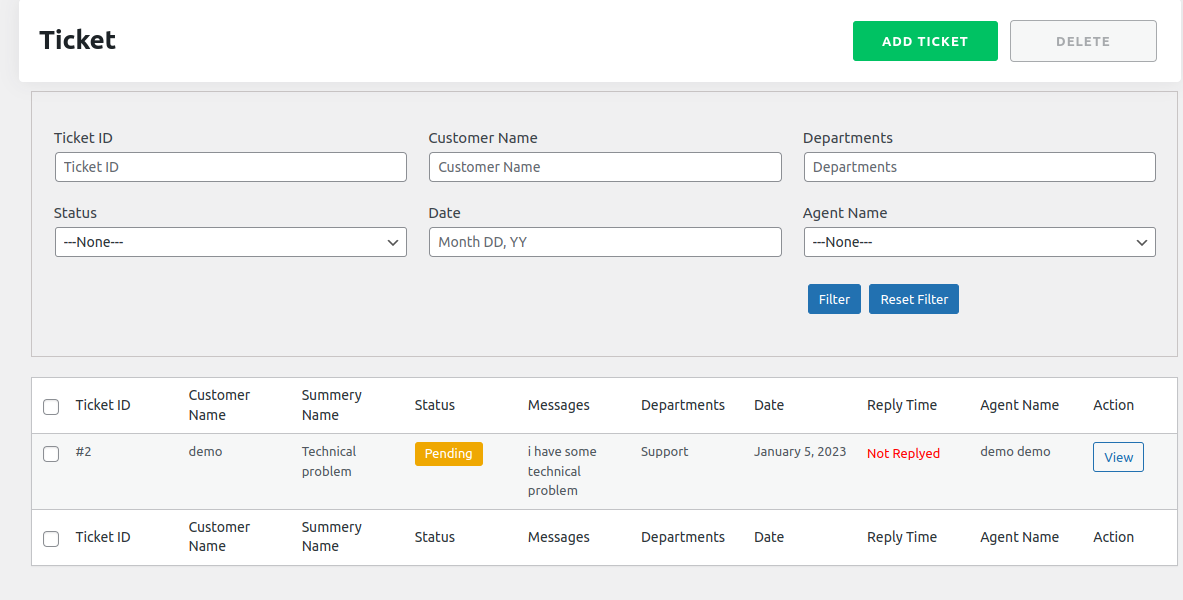
Ticket List :
Admin can see all The Tickets on this page. You can filter ticket from filter section. Admin can assign ticket to the agent from here.
- 1 Select the ticket which you want to assign the agent.
- 2 Now Select Agent from the select agent area.
- 3 After selecting the ticket and agent, click on Assign Agent to assine the ticket to the agent
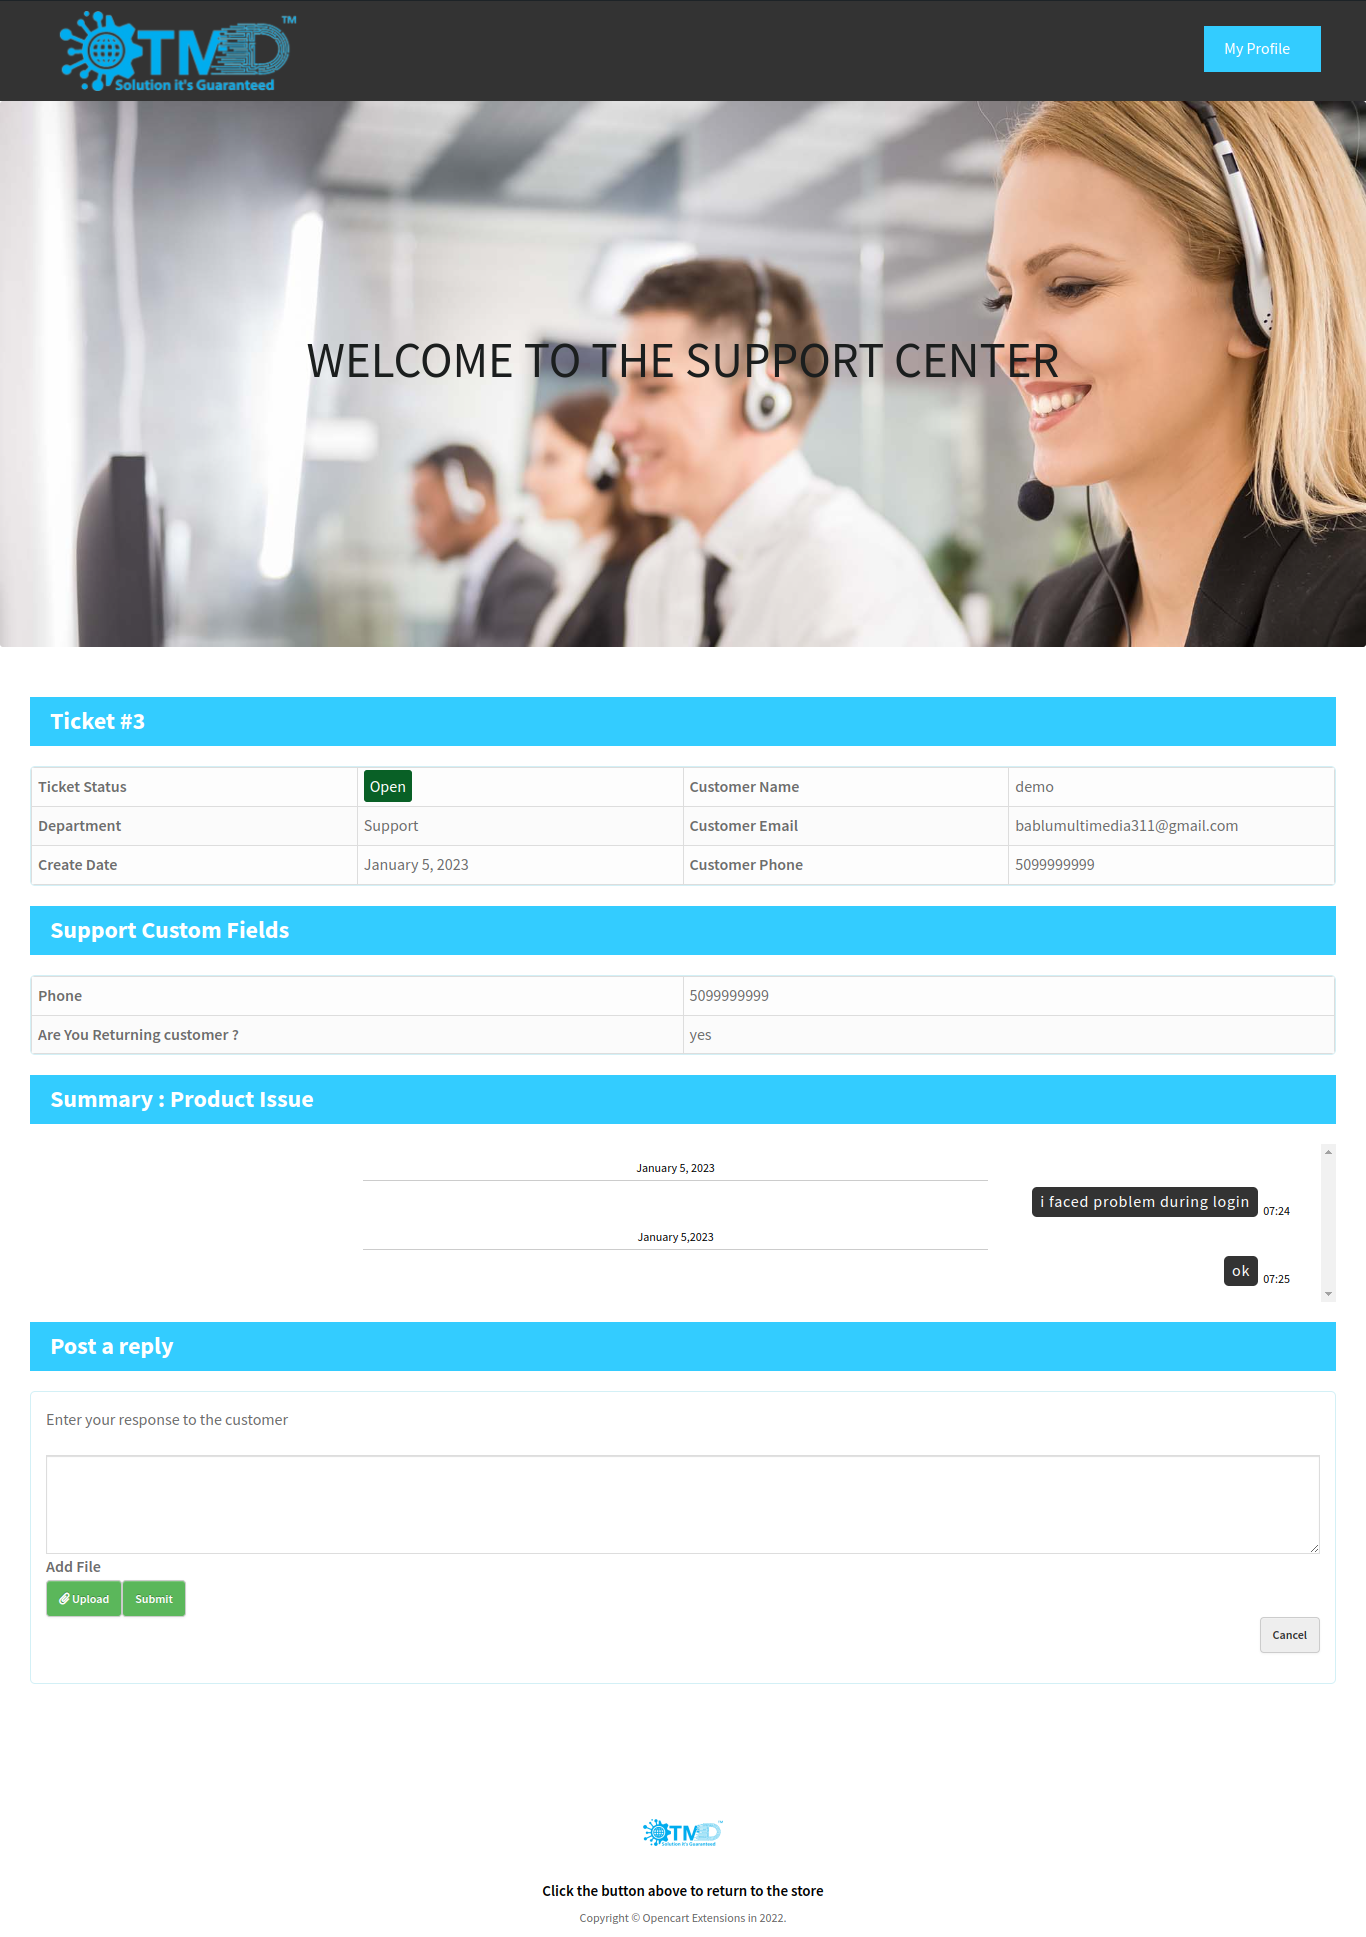
You can click on view button to see the detail view of the ticket
After Clicking on the View button you can see this page.
You can see user message and send reply to the user on this page.
You can also update the status of the ticket.

Custom Fields :
Admin can also create custom fields to get the information from the user. All created custom filleds are shown on the user create ticket form page.
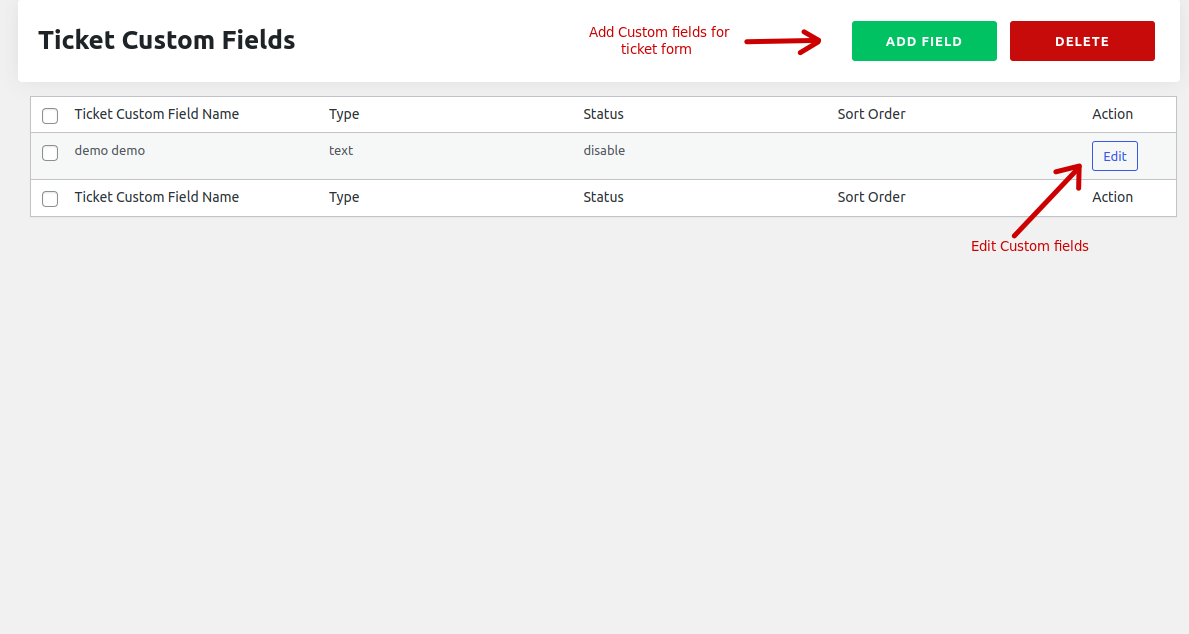 Follow this steps to create Custom fields.
- Click on add field button.
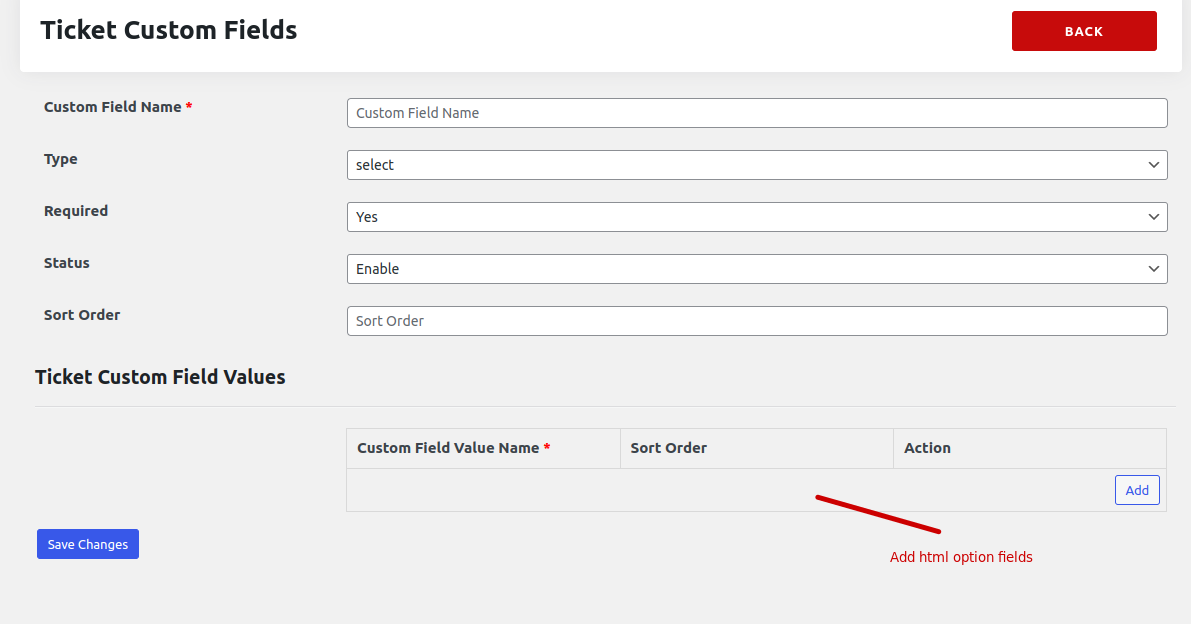
- Fill all the required data.
- if you select type like (Select-option, Checkbox, and Radio) you have to create Options for this filled from custom filled values.
- Now, Click on save change to save this field.
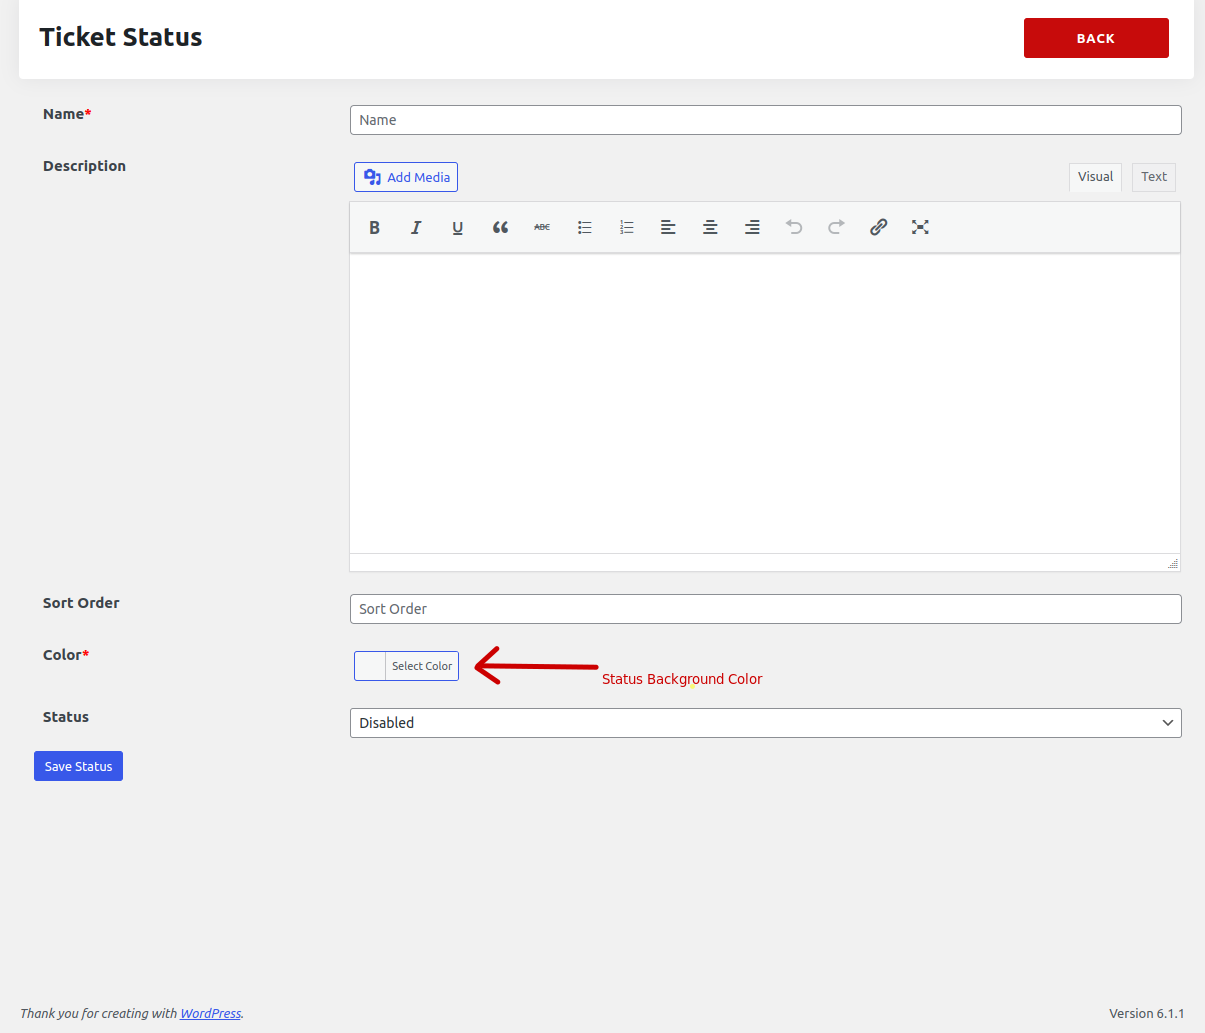
Ticket Status :
You can See all ticket status here. you can also add new status and edit status.
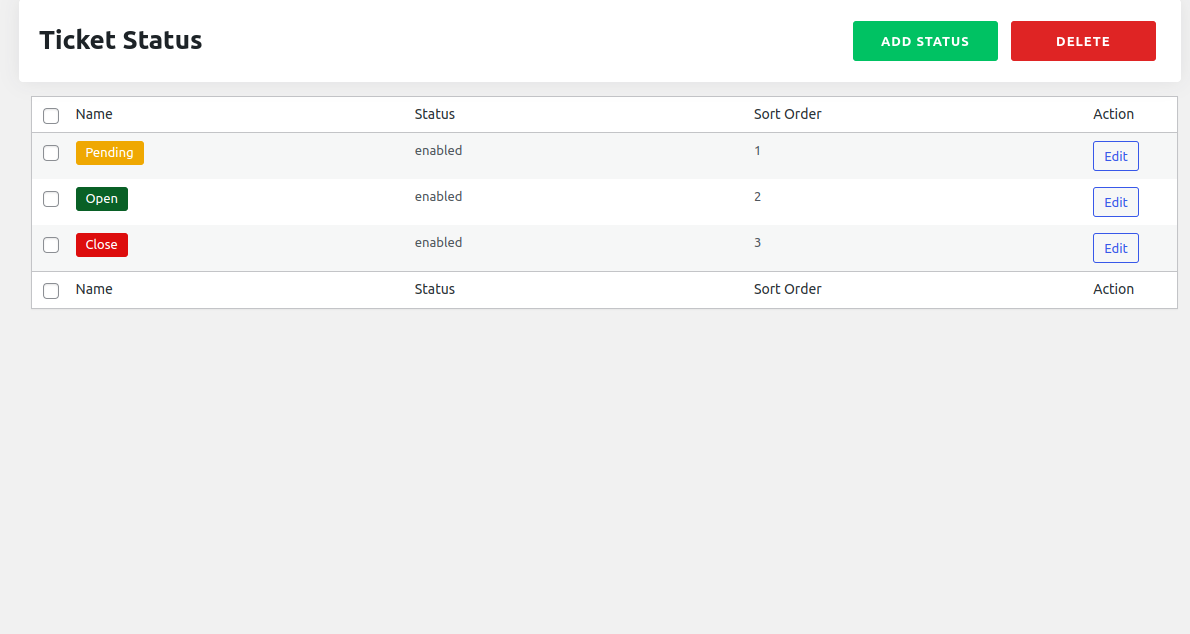 Follow this steps to create Ticket Status.
- Click on add Status button.
- Fill all the required data.
- Now, Click on save status to save the status.
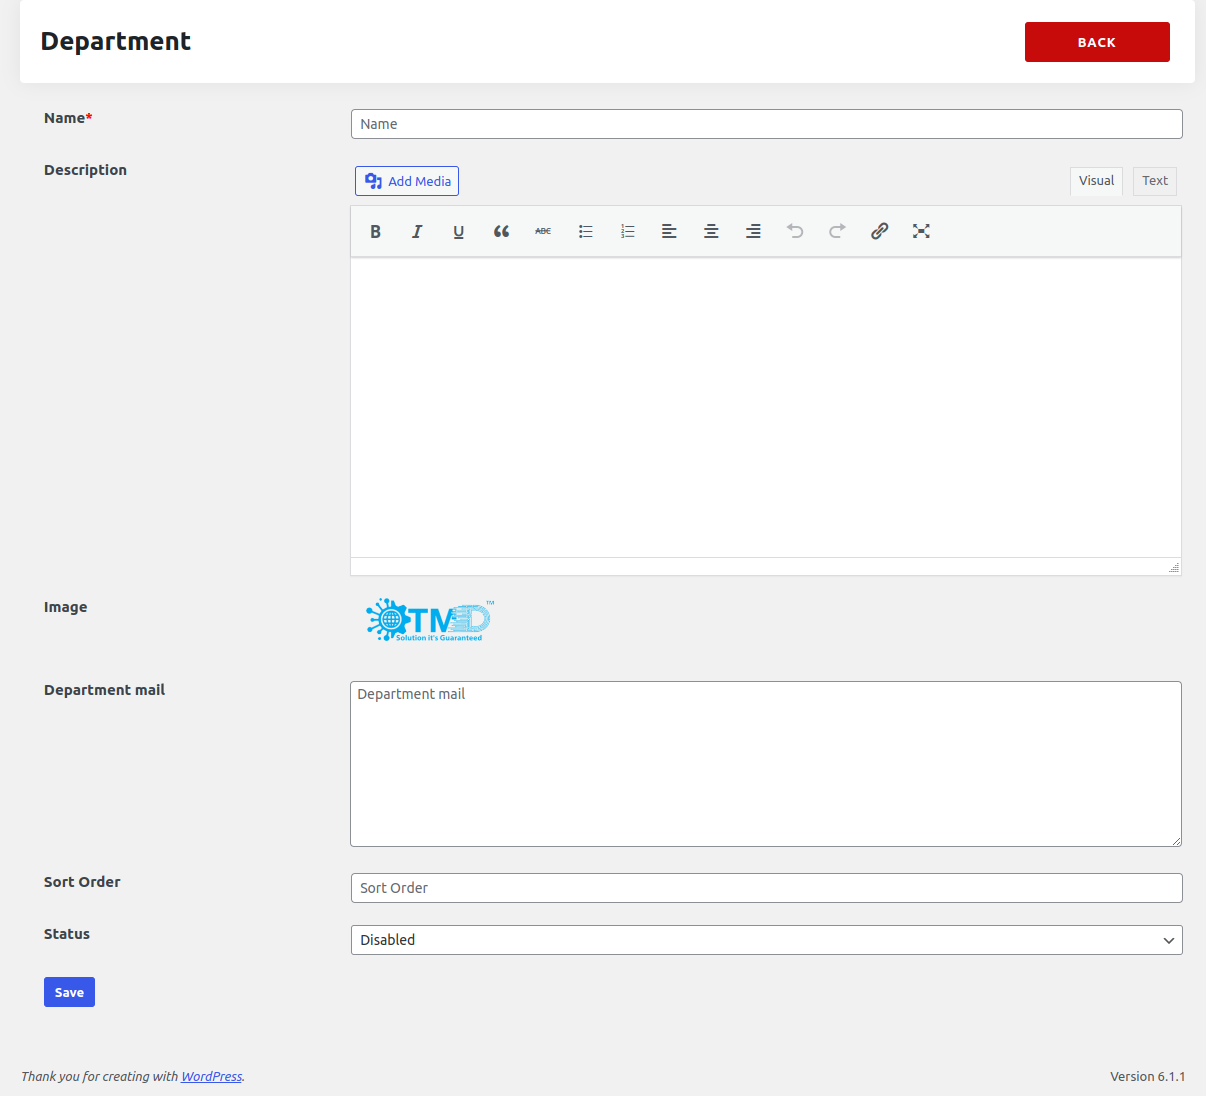
Department :
You can also create different ticket department from here.
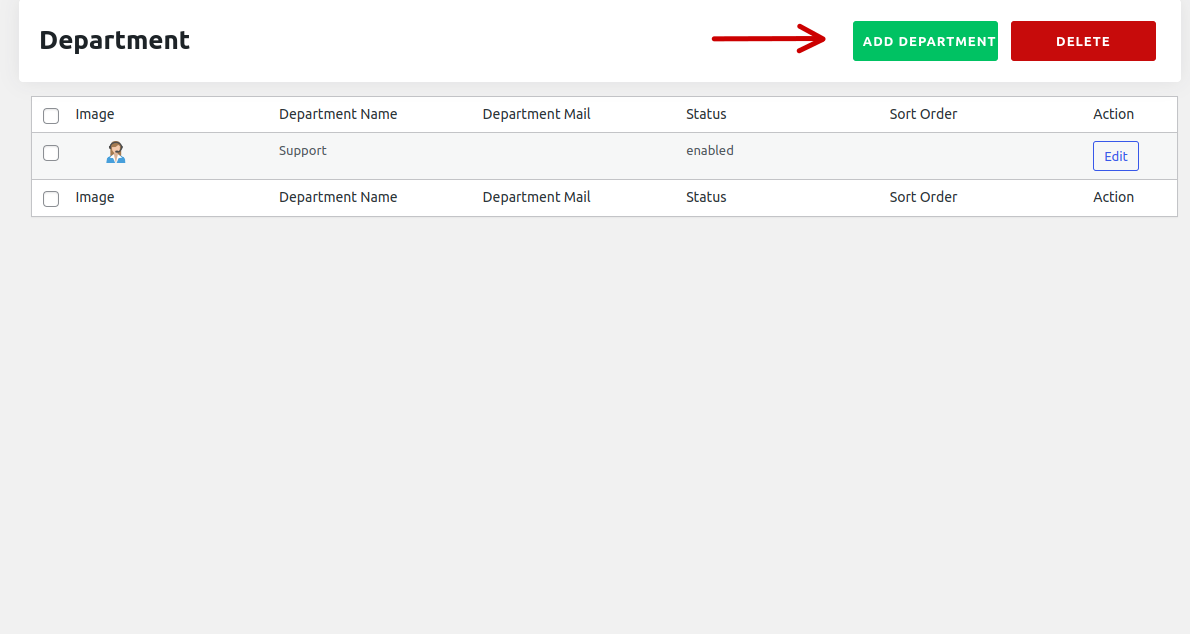 Follow this steps to create Ticket Department.
- Click on add Department button.
- Fill all the required data.
- Enter Departmrnt Mail to send the notificton while user create ticket for this department
- Now, Click on save button to save the department.
Knowledge :
You can add knowledge about your work and also add solutin about your work. The Knowlege you have added are shown on the user support dashboard page.
Follow this steps to add Knowledge.- Click on add New button.
- Enter Title of the Knowledge.
- Enter the content of the knowledge.
- Click on set Featured image to set the image of the knowledge.
- Select the category of the knowledge
- Now, Click on Update button to save the Knowledge.
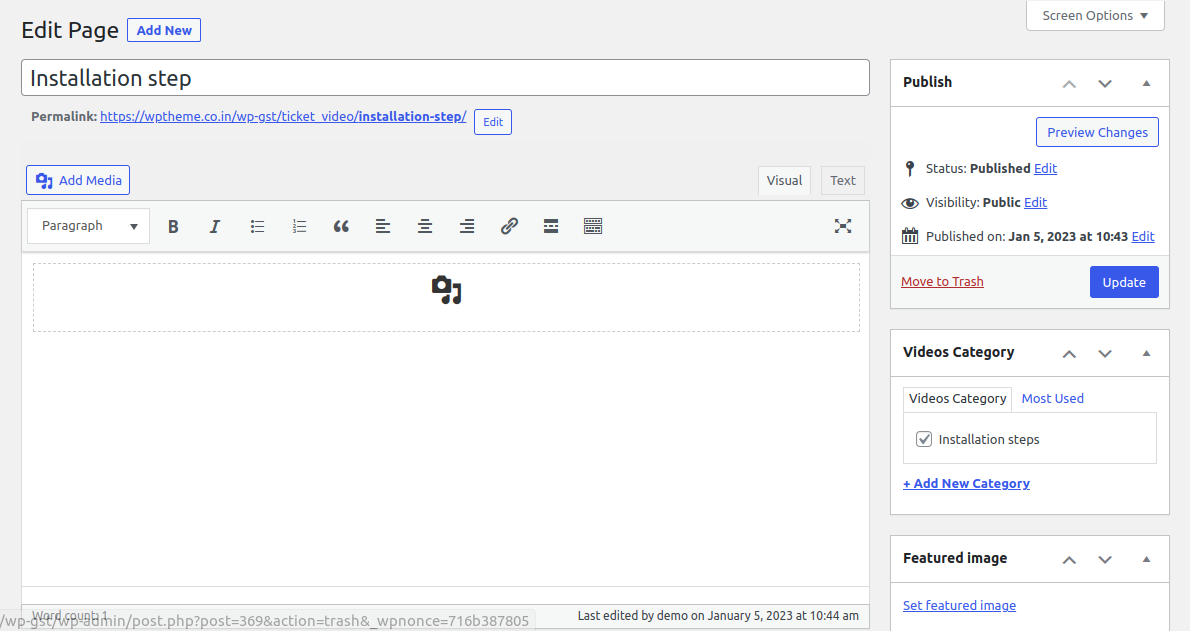
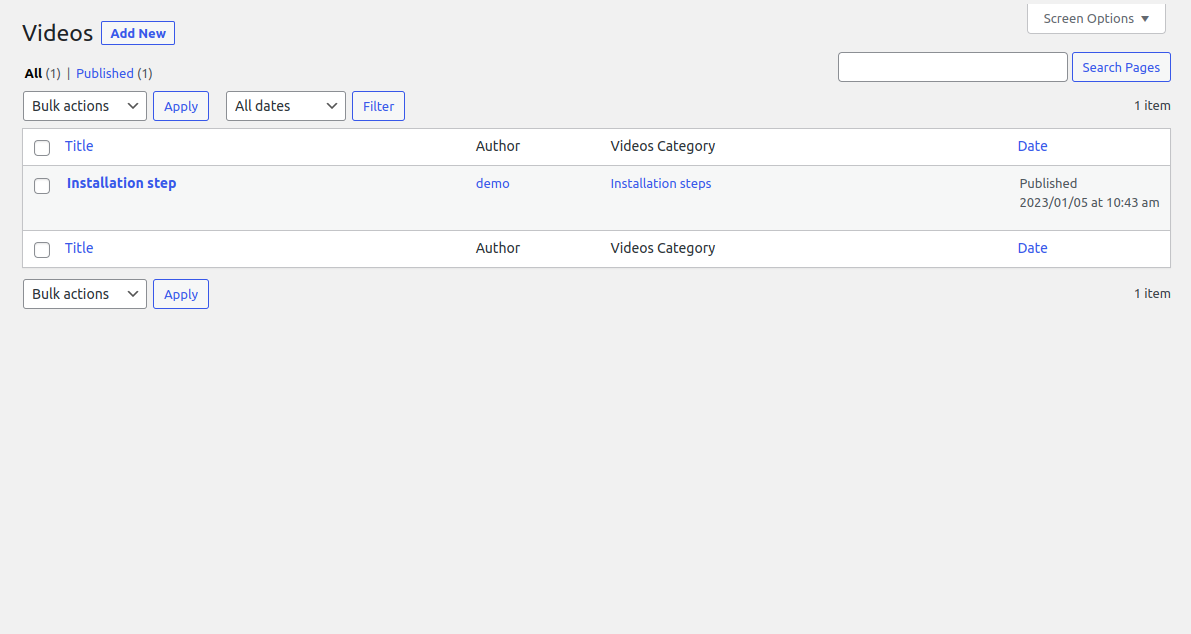
Videos :
You can also add the videos of your work and also provide the videos solution. The Videos you have added are shown on the user support dashboard page.
 Follow this steps to add Videos.
- Click on add New button.
- Enter Title of the Videos.
- you can direct paste the link of the video, or you can also click on add media to add videos
- Select the category of the Video
- Now, Click on Update button to save the Video.
Agent Dashboard :
Agent Create by admin, and admin assgin user role agent. agent can access ticket and work on it, reply the customer and notify customer also update the ticket statusThere is a seprate dashboard for the Agent. Agent can easily manage ticket from the dashboard. Agent can also filtered ticket according to the date. Agent can easily see all assigned ticket and easily manage this.
Ticket List :
Agent can see all Assigned ticket list here.
Click on View button to see the detail of the ticket.
Support Dashboard :
Support Dashboard, help user to see vedio and knowledge of differnt Catergory Without Creating Account. User Can also create Account or Login Through Dashboard Panel.
click on My Profile to Create Account or Login to create any ticket.

Create Ticket :
After Login Successfully, User Can create Ticket from here.
Fill all the Required data and than click on Submit Button to save Ticket.
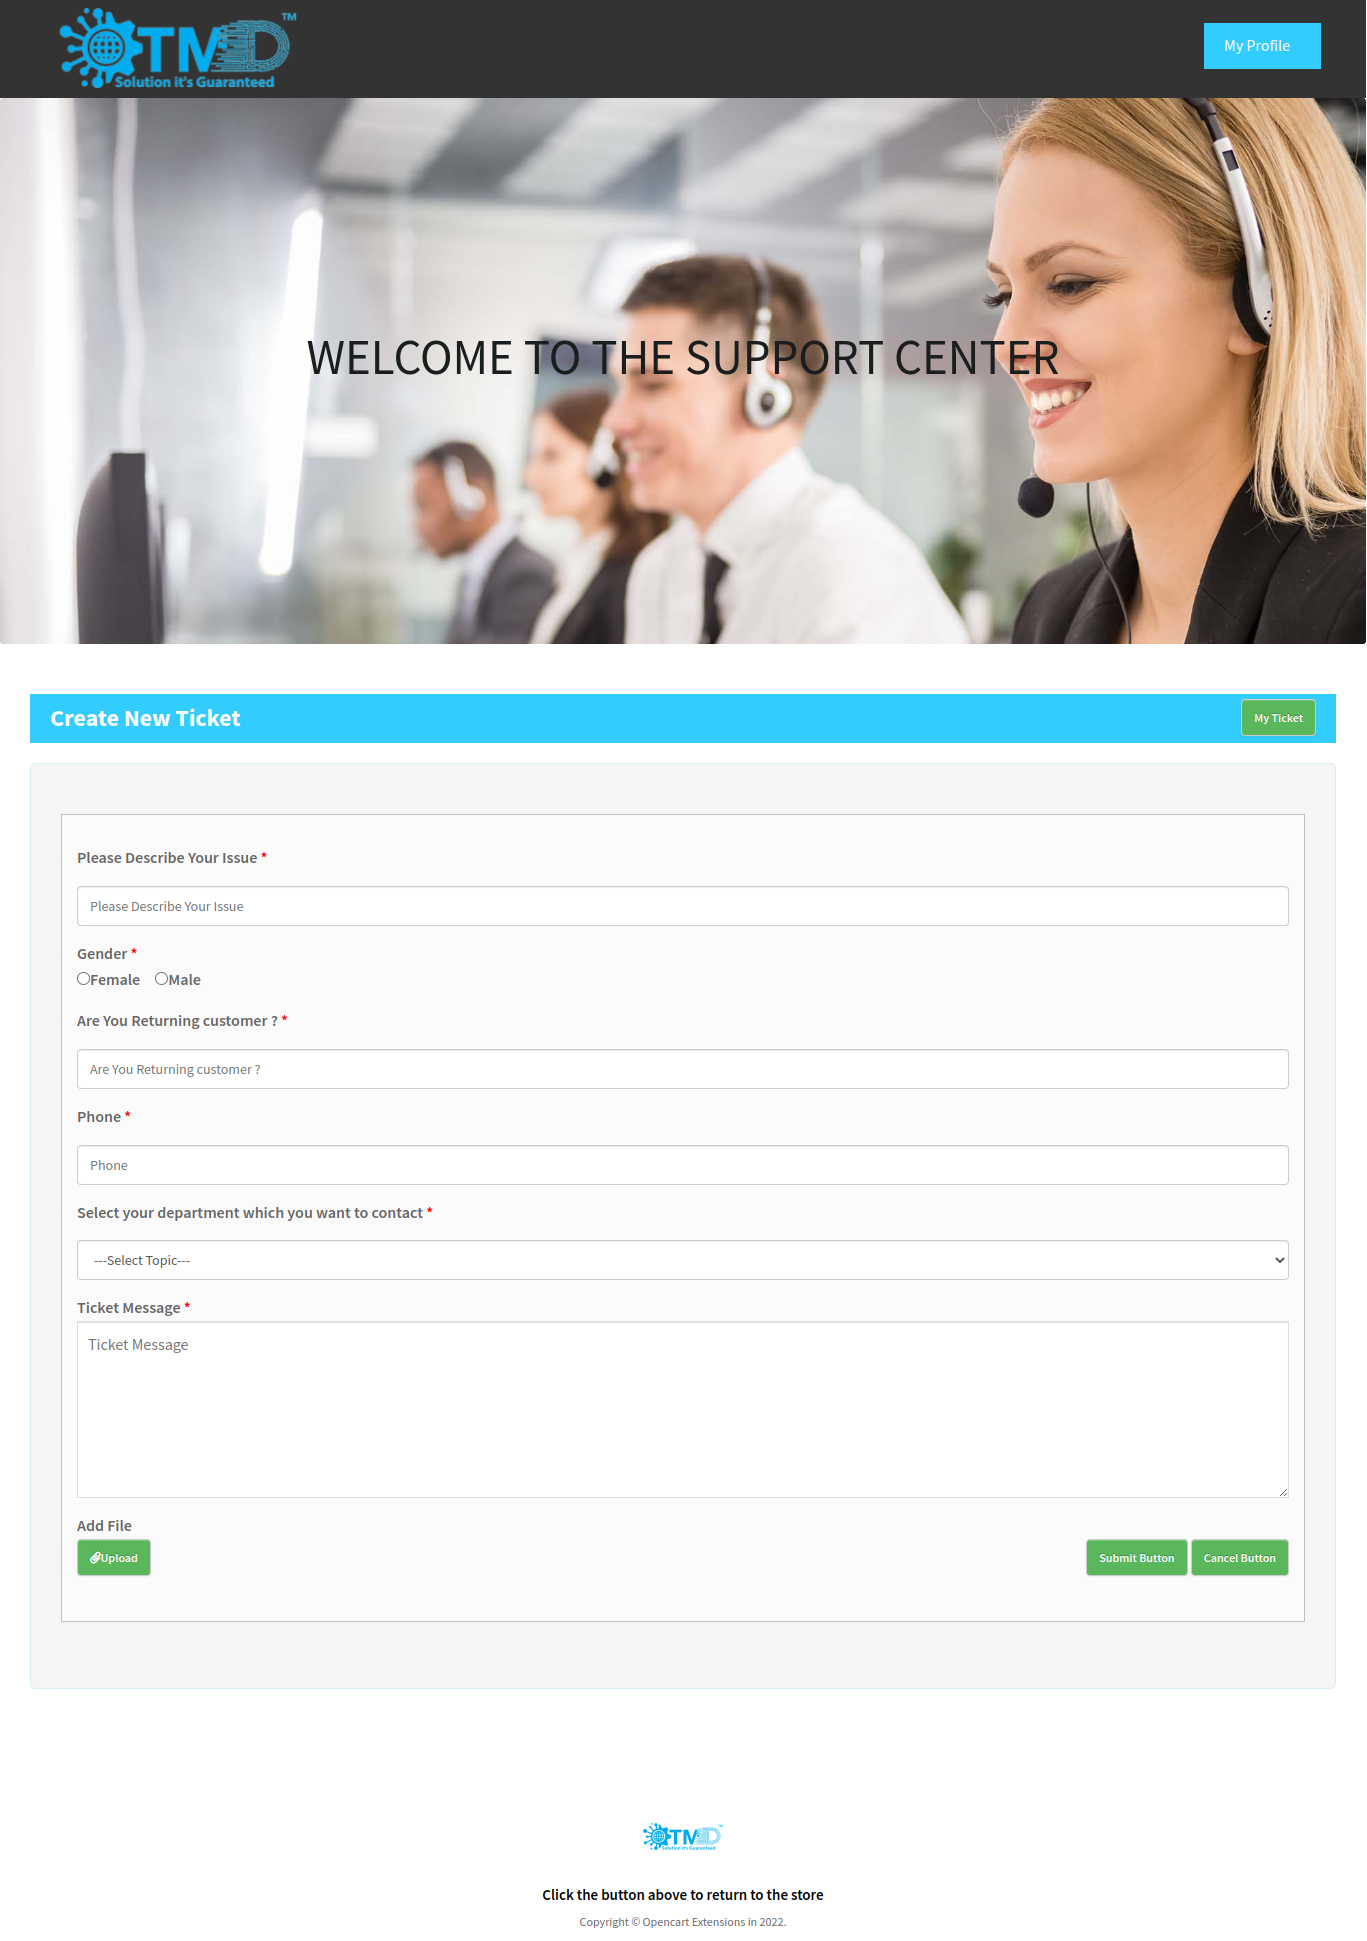
If Ticket Created succssfully User redirected to Ticket List Page.
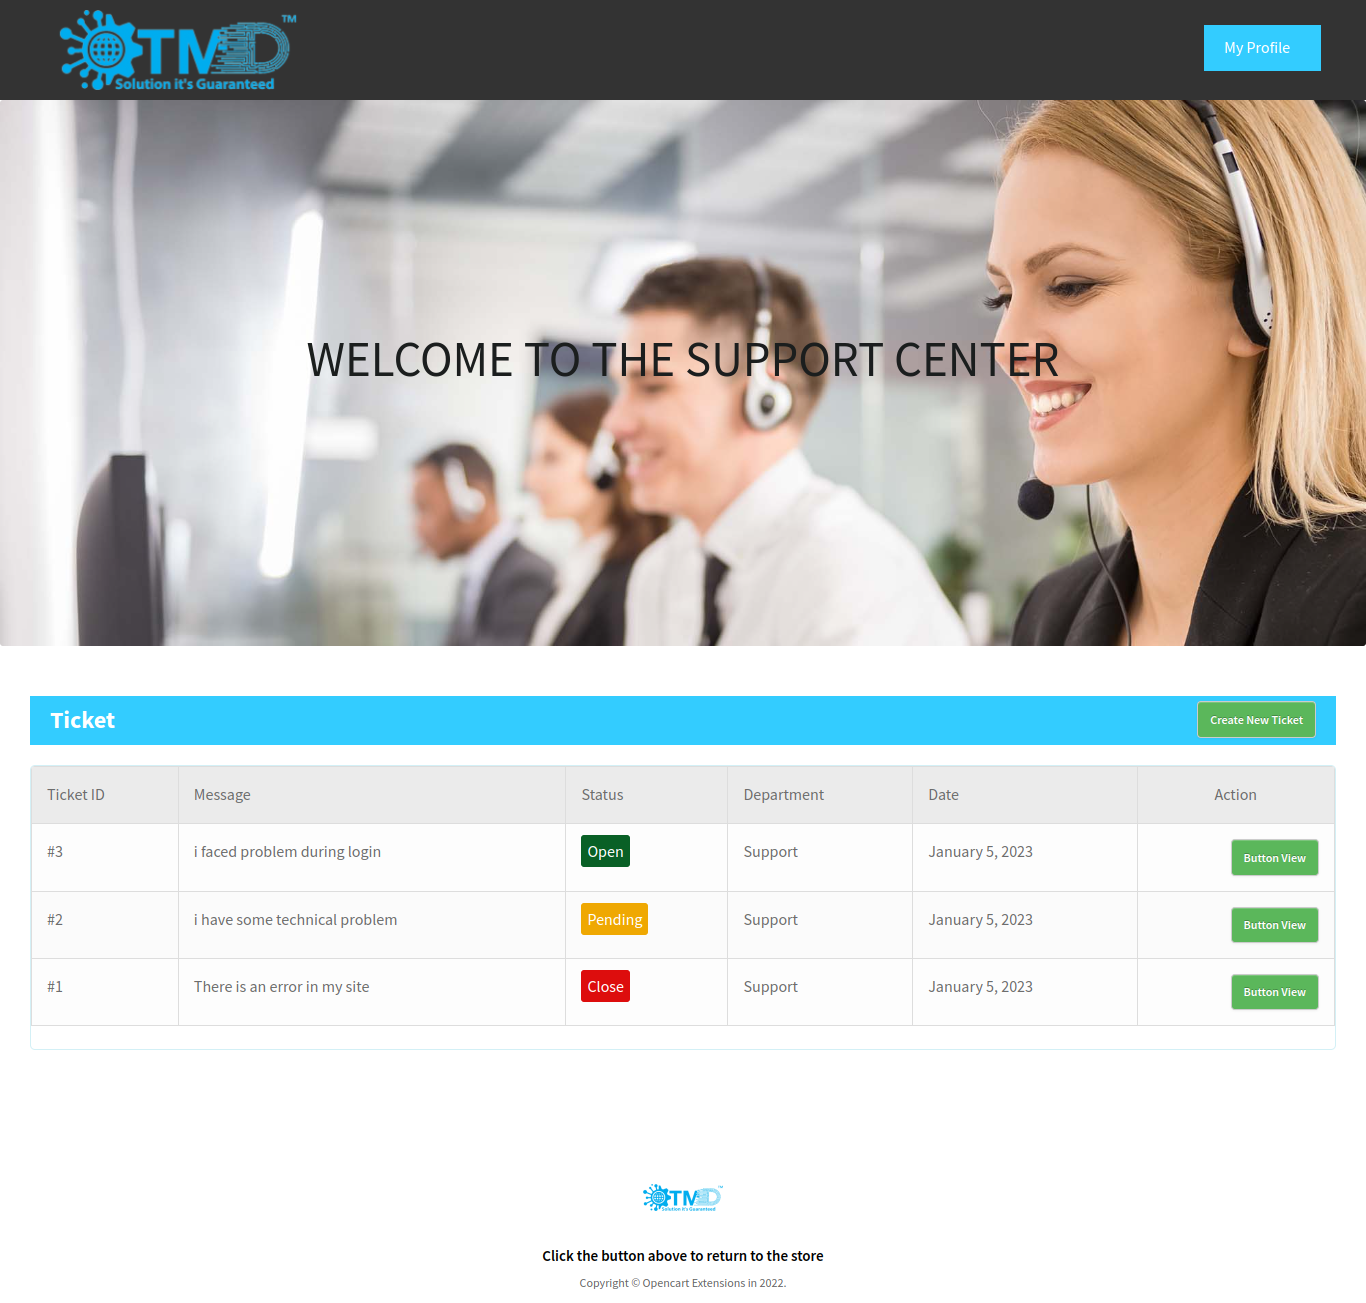
Ticket List :
User can see all tickets on ticket List Page.
click on view button to see detail view of ticket.
View Ticket :
On this page, user can see detailed veiw of this ticket.
user can see status of this ticket and
user can also post reply on this page.